Online forms are very useful as they help any individual gather data or do surveys on a large scale. But is creating an online form difficult? Creating an online form is easy, it requires some basic steps.
In this article, we will teach you how you can create an online form with a few simple easy steps. But before that be responsible with online forms as they can contain personal info like name, number, and address.
Online forms can be used for a lot of good purposes so keep it that way. Now, let’s teach you how to create an online form in 2024.
How To Create an Online Form?
Follow these simple steps given below to create an online form but make sure that you are following these steps in order:
Step 1: Choose an Online Form Builder
There are several online form builders spread across the internet so your first step is to find one for yourself. Here are some of the most popular ones that you can use:
Google Forms: First has to be the most trusted and easy-to-use Google Forms. It has a wide range of functions and can help you build a perfect form.
Typeform If you want to create eye-catching/beautiful forms to attract more people use Typeform this is just the right builder for you. This builder also offers a 75% discount on its premium.
JotForm: Being able to choose from a wide range of templates can help you build the best form and JotForm has more than enough templates. Users can also access the free version or the paid version.
Microsoft Forms: Microsoft Forms is part of Microsoft Office and is considered one of the best builders when it comes to collecting data. It is also free for the most part but might require a premium for a few services.
Each tool has something to offer so choose the one which is most suitable for you.
Step 2: Sign Up or Log In
Once you’ve found your form builder, the second step would be to create your account. You can use your email to create an account and if you already have one use your email to log in.
Step 3: Start a New Form
After creating your account you will have to look for options like “Create New Form” or “Start a New Form.” You will be redirected to a blank form or you’ll have different templates to choose from. Choose the template you like the most as your form.
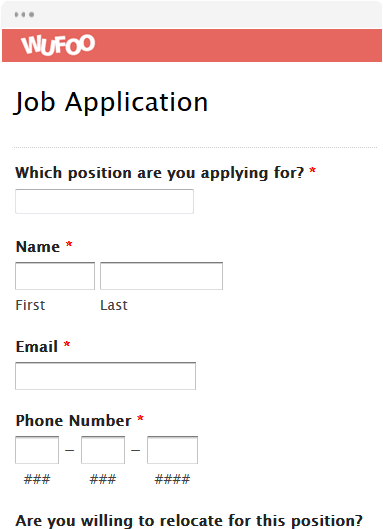
Step 4: Add Questions and Fields
It’s time to brainstorm and design your form. You’ll have to add different types of questions and fields for example :
Multiple Choice: You can add more than one option and people can choose one from the given options.
Checkboxes: Suppose you have added a question and there could be more than one answer to it in that case add checkboxes so people can select multiple options.
Short Answer: If any question requires a small answer leave a field for it.
Long Answer: Just like the short answer but requires more space because the answer is going to be longer.
Rating Scale: Can ask the form readers to rate something on a scale. Could be anywhere between 1 to 5 or 1 to 10.
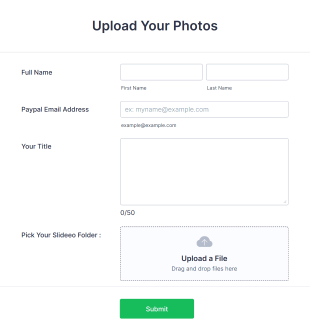
File Upload: An important field if your form requires any document or file uploaded you’ll have to add this field so people can easily upload here.
Your form needs to be well organized so anyone can understand it and fill it out. Make proper heading and keep it logical.
Step 5: Customize Your Form
There are some customizations you can make in your form to make it user-friendly and appealing:
Change the Theme: Form builders often allow their users to choose different colors, fonts, and designs from a site called Random Color Generator. Use this and make your form attractive.
Add Images and Videos: Only texts can make your form look boring, try to incorporate images and videos to make it engaging.
Set Required Questions: There must be questions that will be mandatory to answer and make proper indicators for those questions so they are not skipped.
Step 6: Configure Settings
Your form does need to be submitted but not before you look at it thoroughly and make some adjustments in the settings. Some important settings include:
Response Collection: You can either make the responses anonymous or collect the email of the person who has responded.
Limit Responses: Yes, you can and you should set a limit on how many responses you want to receive.
Confirmation Message: Do not leave your users hanging, create a customized message that they can see after their form is filled.
Step 7: Preview Your Form
Your form builder will give you an option that you can use to preview your form and do testing to see all your questions are on point and functions are working properly.
Step 8: Share Your Form
So, you’ve created your form? Now what’s left? Submitting and sharing it. Few ways you can share your form:
Link Sharing: Your form will come with a generated link which you can copy and share via email, website, or social media.
Embed Code: If the form is created for a site use the embed code and share it directly on the site.
QR Code: Nowadays some form builders even offer QR codes that you can print out and people can scan the code and it will lead them directly to the form.
Step 9: Collect and Analyze Responses
Your last step would be to see your progress on the responses and gather data. Most of the builder forms will give you this feature which you can use to see the answers in graph or summarised forms. How you can check the responses:
View Responses: Go to your builder’s dashboard and look at the response stats.
Export Data: If there is a need and you want to do an in-depth analysis export the data to Excel or Google Sheets.
Conclusion
Creating your online form is easy. You must’ve realized that by now. These forms are very useful and can be used by any individual or big firm. Just follow all these simple steps and you are good to go.
But don’t misuse these forms to get someone’s personal information. Be responsible and make good use of it that could help you or the organization.